
Setting up a Navmesh in Unity
Hey there! This brief guide/tutorial highlights the steps to take to generate a static navmesh for a level in Unity so your AI minions can run about happily.
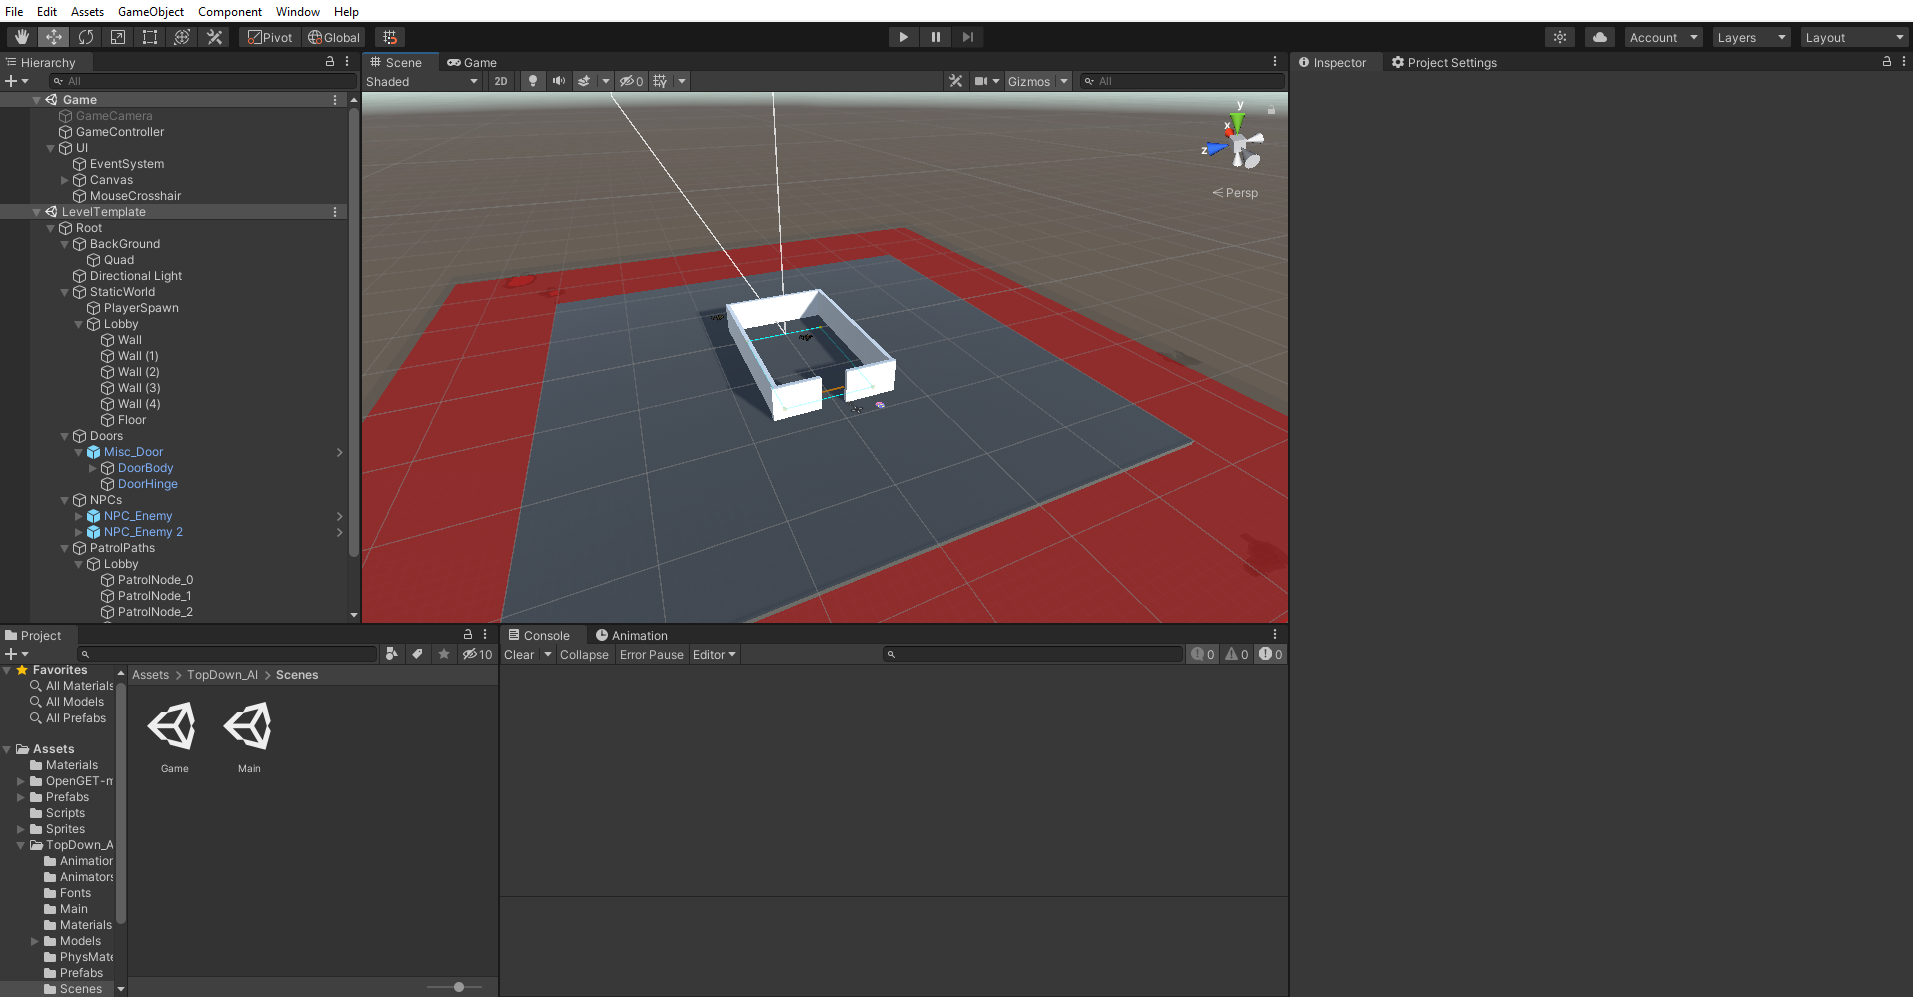
I have setup an example 3D top-down project with a simple box room level scene. At present, the level does not have a navigation mesh, so the poor NPCs can’t figure out what to do with themselves and stay stuck in one spot. What’s a navigation mesh? A navmesh, as it’s often referred to, is a special mesh that enables autonomous agents like NPCs and other AI to do path finding and move about in the game world.
Once you’re happy with a level scene setup with a bunch of walls, floors and so on, you can create a navmesh for that scene. Before doing anything - make sure the correct scene is set to “active” in the hierarchy; this is the scene that the navmesh will be generated for.
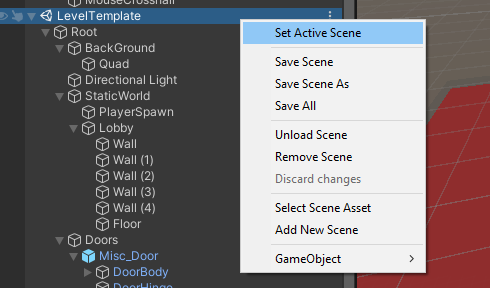
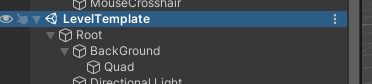
Once the scene is set active, it’s name will be formatted in bold text as so:
Okay, now that’s done, open up the Navigation tool window - this can be found under Window -> AI -> Navigation in the top Unity tool bar.
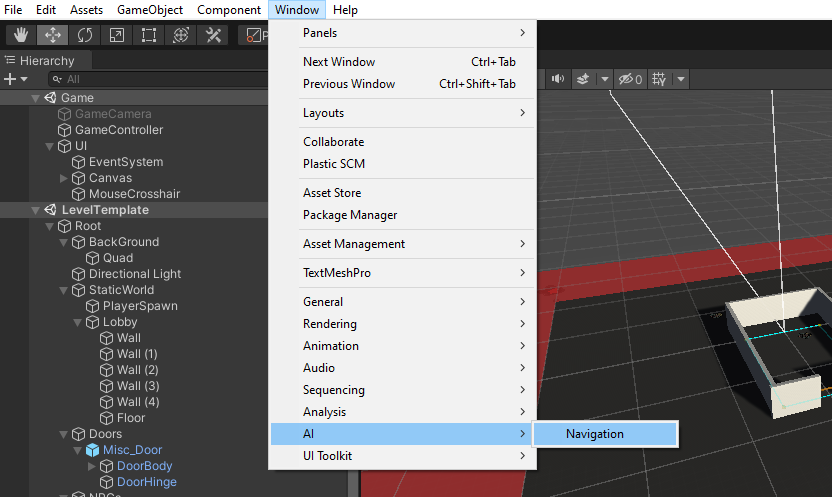
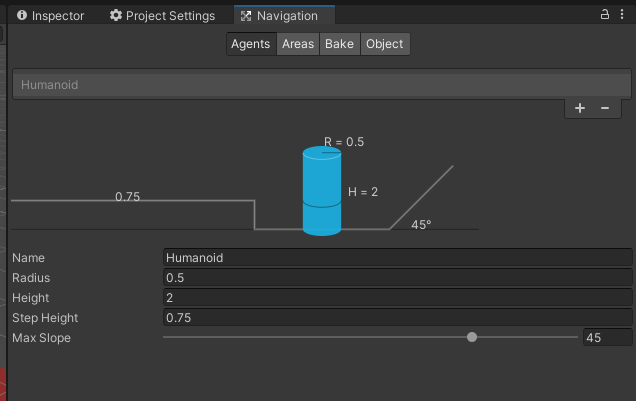
This should open the navigation tool window. Here you can specify details about the autonomous agents that the navmesh will be designed for - with details such as whether the agents are humanoid, how tall they are, and so on. This will help the navigation tool figure out what parts of the level are obstacles such as walls and what parts are navigable, like floors or stairs. You can tweak these settings as needed per level scene.
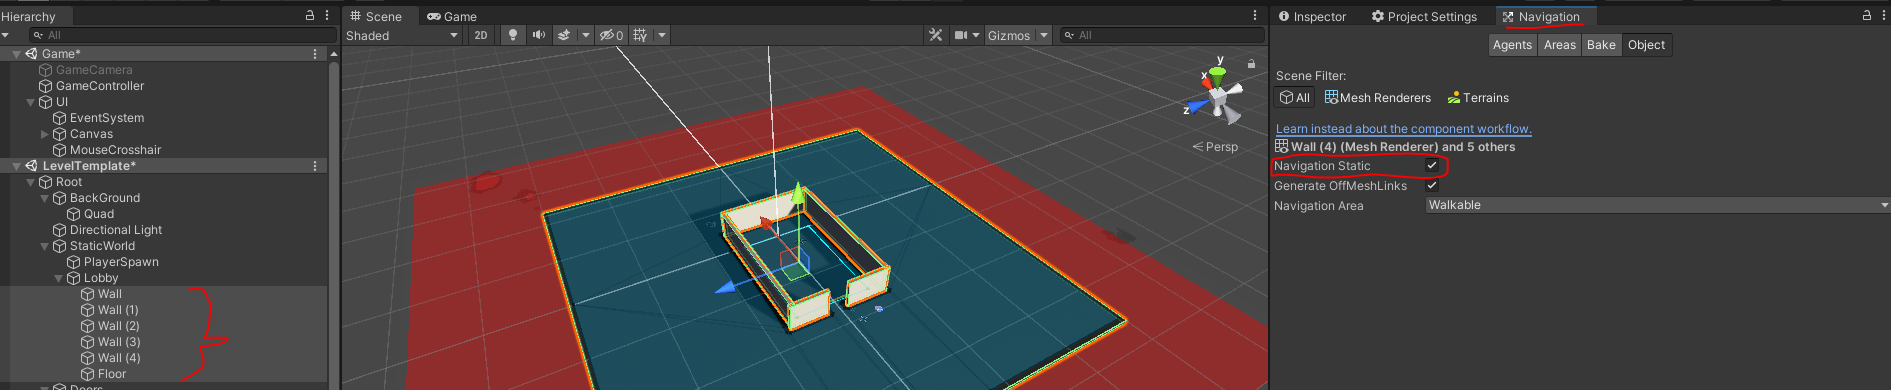
Before we actually bake the mesh, we should first make sure that the parts of level that should be traversable by NPCs is marked as static for navigation. I also set these parts of the level static for other engine components such as render batching to make the level more efficient:

Next, go to the Navigation window and select the “Objects” tab. Here we should make sure all these meshes that we want to use for navigation are marked static and walkable:
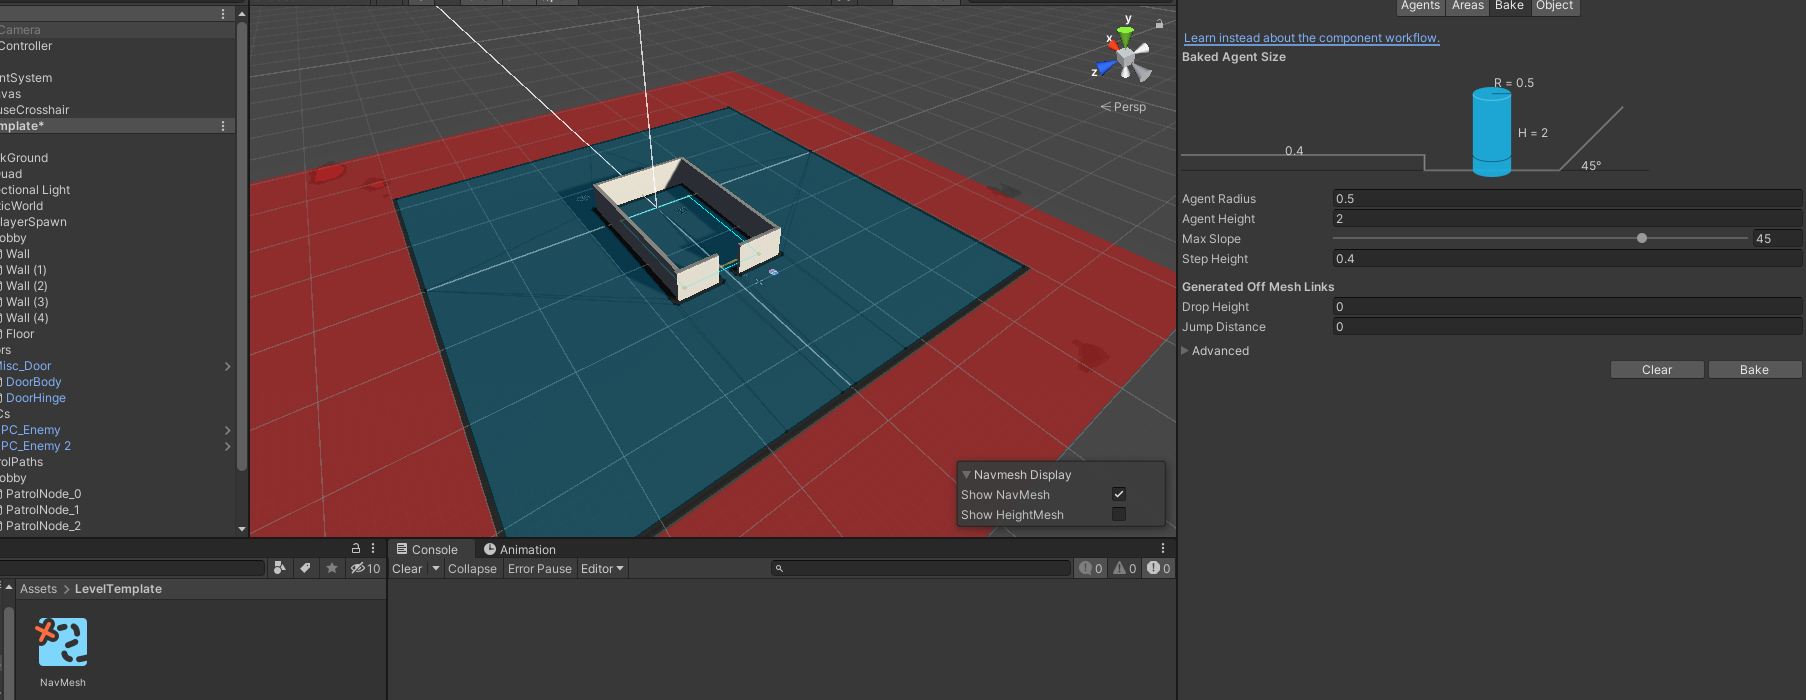
Now we can go ahead and actually generate the mesh. Go into the “Bake” tab of the Navigation tool window, then click the “Bake” button. This will generate a new navmesh just for the active scene:
And it’s really as simple as that in most cases. There are some other tricks and things to look out for, but this should get you started. Now your NPCs can wander the level and get up to all sorts.